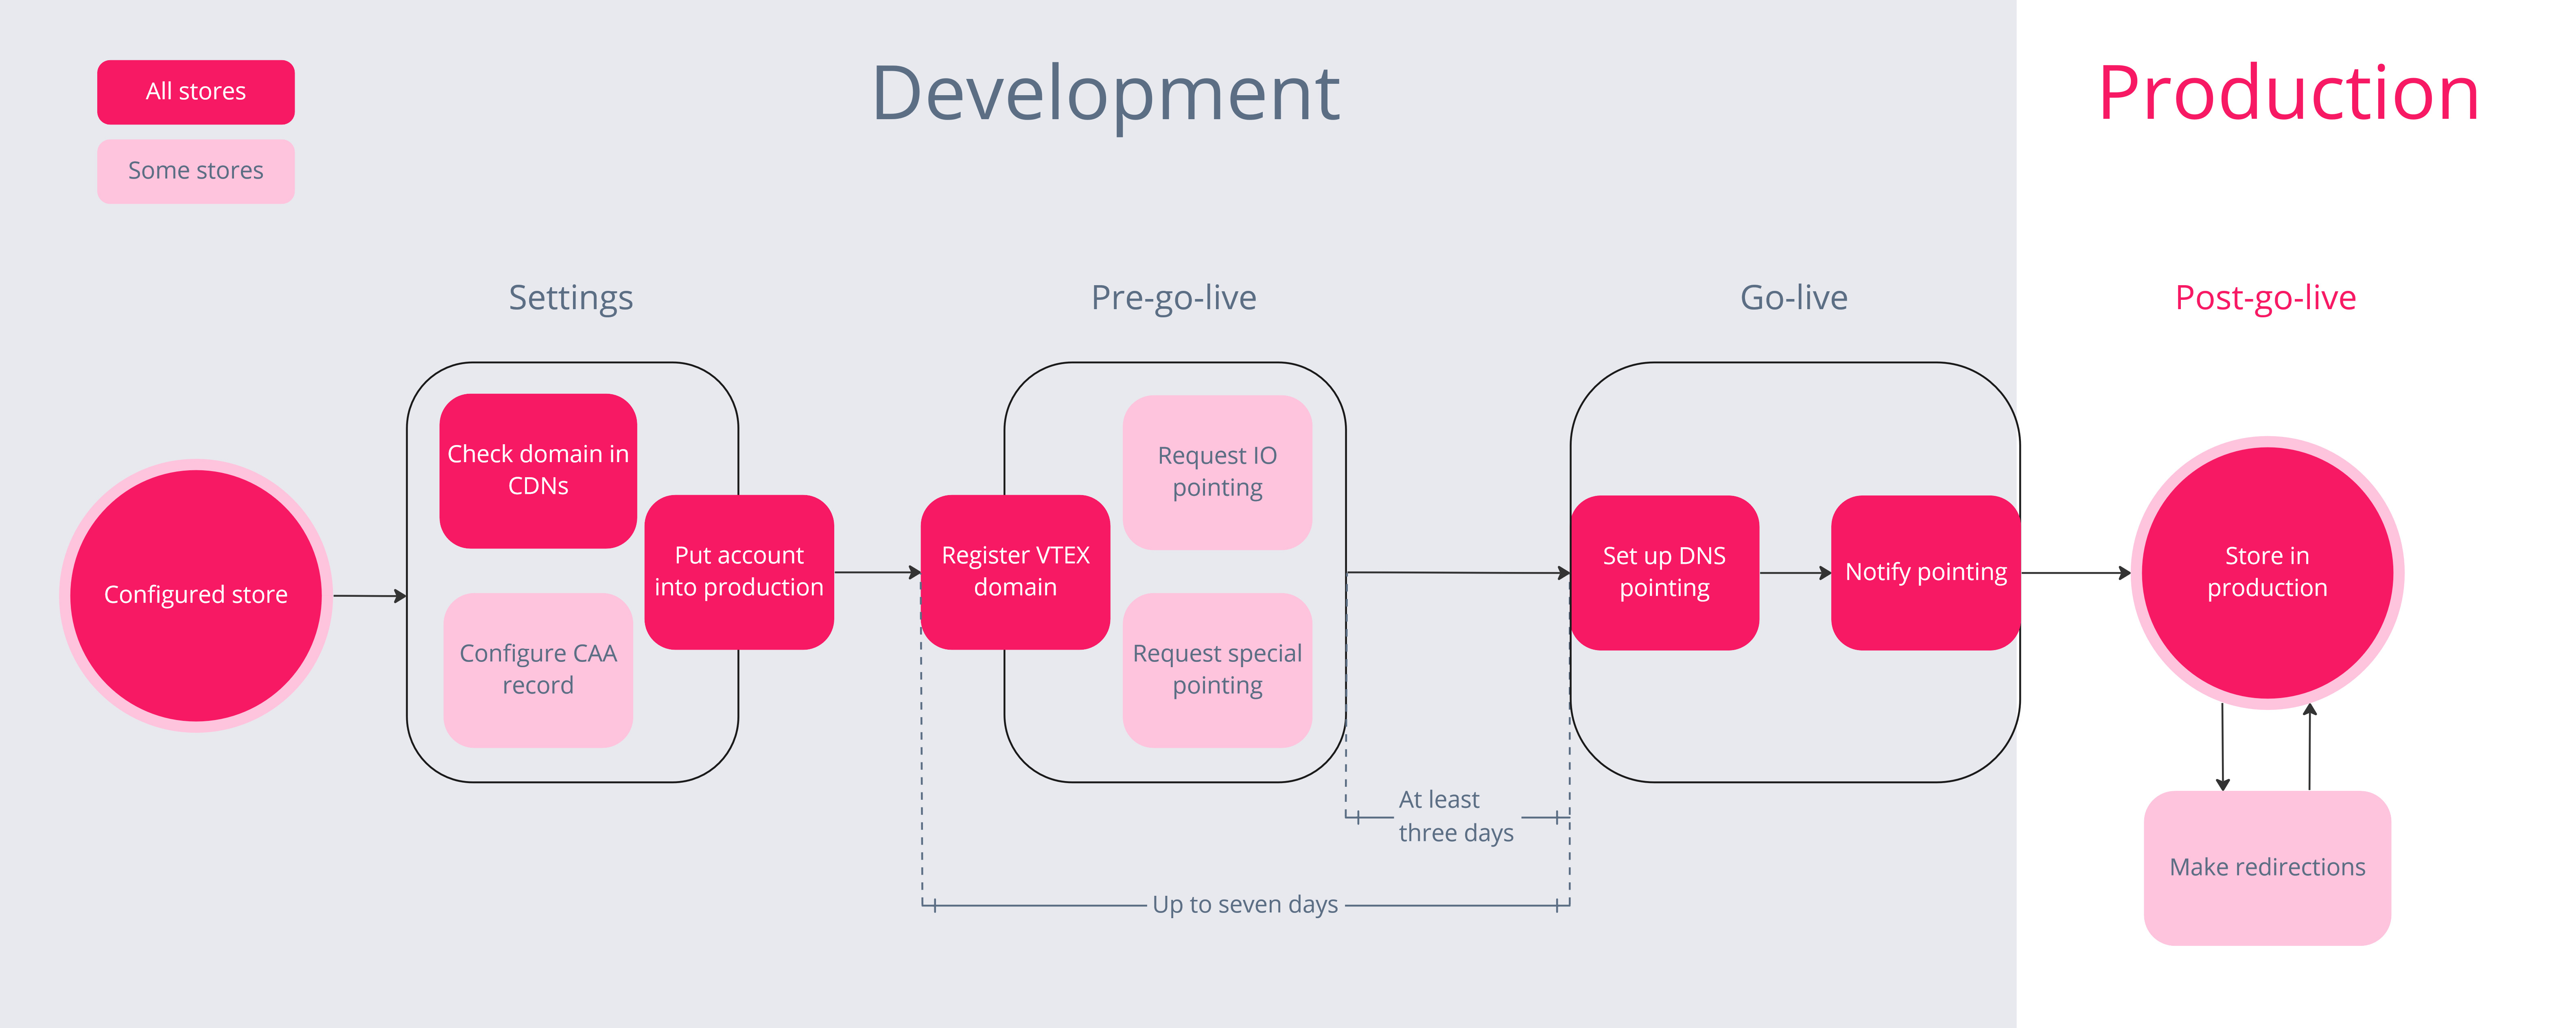
If you have configured your store's operation and built your storefront, it is time to go live. This process puts your new VTEX store into production, making it available for customers to access it and make purchases.
Here you will find detailed step-by-step instructions on how to go live with your store.

Note that a store in production is different from an account in production. In general, to have a store in production, you need to put the account in production and set up DNS pointing. See below all the steps involved in this process.
Before you begin
Before going live, you need to ensure that you have set up all configurations for your store to run smoothly.
Copy this Store configuration checklist and check if you have configured each item according to your desired operation.
The checklist above lists the basic features and configurations required to run a VTEX store. It is your team's responsibility to determine which features to implement in your store and how to configure them to create the desired store experience. Therefore, this list may only cover some of the features your store uses, and you must check all aspects of your store's operation, even if they are not on the suggested list.
Instructions
Your store's go-live process may vary depending on some aspects of your operation. As some steps are time-sensitive, we recommend you plan your go-live process at least 15 days in advance.
If you use the Legacy CMS Portal and want to migrate to a storefront built using CMS IO, follow the instructions in the Migrating your storefront from Legacy CMS Portal to Store Framework guide.
For organization and convenience, this guide divides the steps involved in the go-live into four stages: